
Fix Text Neck with These 6 Exercises

Whether you’re working from home, using your cellphone to keep in touch with friends and family members, or just spending your free time scrolling through social media, we are spending more time than ever on our phones! But spending so much time hunched over and looking at screens can be damaging to your neck, back, and overall posture.
Strengthening and stretching your muscles may help alleviate some of that nagging neck pain, says Aixa Goodrich DC, FMP, of South Florida Rehabilitation and Wellness Center.
So, with the help of professional chiropractors, we rounded up the best equipment-free stretches and exercises. Incorporate these into your daily routine one to three times a day to help show text neck who’s boss.
1. Exaggerated nod
The exaggerated nod counterbalances the downward/forward head position by pulling your shoulders down and back, and increasing neck mobility, explains Cappo.

How to do it:
Start by sitting at your desk or standing comfortably with your shoulders relaxed. With your mouth closed — teeth touching but not clenching — look up to the ceiling.
Pause here and let your jaw relax and open your mouth. Now see if you can bring your head further back an inch or two (typically you can).
Keep your head still here and bring your lower jaw to your upper jaw, closing your mouth. You should feel a stretch in the front of your neck.
2. Downward-Facing Dog
Downward-Facing Dog is useful for opening the anterior chest wall and shoulders — which are often rounded and tightened from excessive tech usage, Goodrich points out. This pose is all about upper-body strength, which means if you don’t have the shoulder strength you might compensate by scrunching your shoulders up to your ears. If you notice yourself doing this, actively draw your shoulder blades down your back, which will create space in your neck.

How to do it:
Begin on all fours. Tuck your toes and lift your hips high, reaching your hip bones toward the ceiling.
Reach your heels back toward the mat, but don’t let them plank on the ground.
Drop your head so that your neck is long. As you stay here, make sure that your wrist creases stay parallel to the front edge of the mat.
To alleviate the pressure on your wrists, press into the knuckles of your forefingers and thumbs.
Breathe here for at least three deep breaths. Then release.
3. Cat-Cow
Your core and pelvis should drive the Cat-Cow flow: As you inhale you create an anterior tilt to the pelvis so that your tailbone is facing the ceiling, and as you exhale you create a posterior tilt so that your tailbone is turned toward the ground. This movement sequence helps increase spinal awareness, which is a large part of less-than-perfect posture.

How to do it:
Start on all fours with your shoulders stacked over your wrists, your hips stacked over your knees, and the tops of your feet pressed into the ground. Look down a few inches in front of your fingers and lengthen from your head down to your tailbone.
To begin the ‘cat’ phase, use your abs to curl your spine toward the ceiling while tucking in your tailbone (making the shape of a Halloween cat) as you exhale. Lengthen your neck and allow your chin to reach down and in, toward your chest, so your ears come down by your biceps.
To begin the ‘cow’ phase, swoop and scoop your pelvis so your belly drops down to the floor as you inhale. Broaden across your shoulder blades, drawing your shoulders away from your ears, and lift your chin and chest to gaze up toward the ceiling.
Cycle through Cat-Cow a few times, keeping stress and pressure out of the head and neck.
4. Padahastasana
Padahastasana stretches the neck and hamstrings, which means that it’s fighting text neck and hips that are tight from sitting all day at the same time, explains Goodrich.
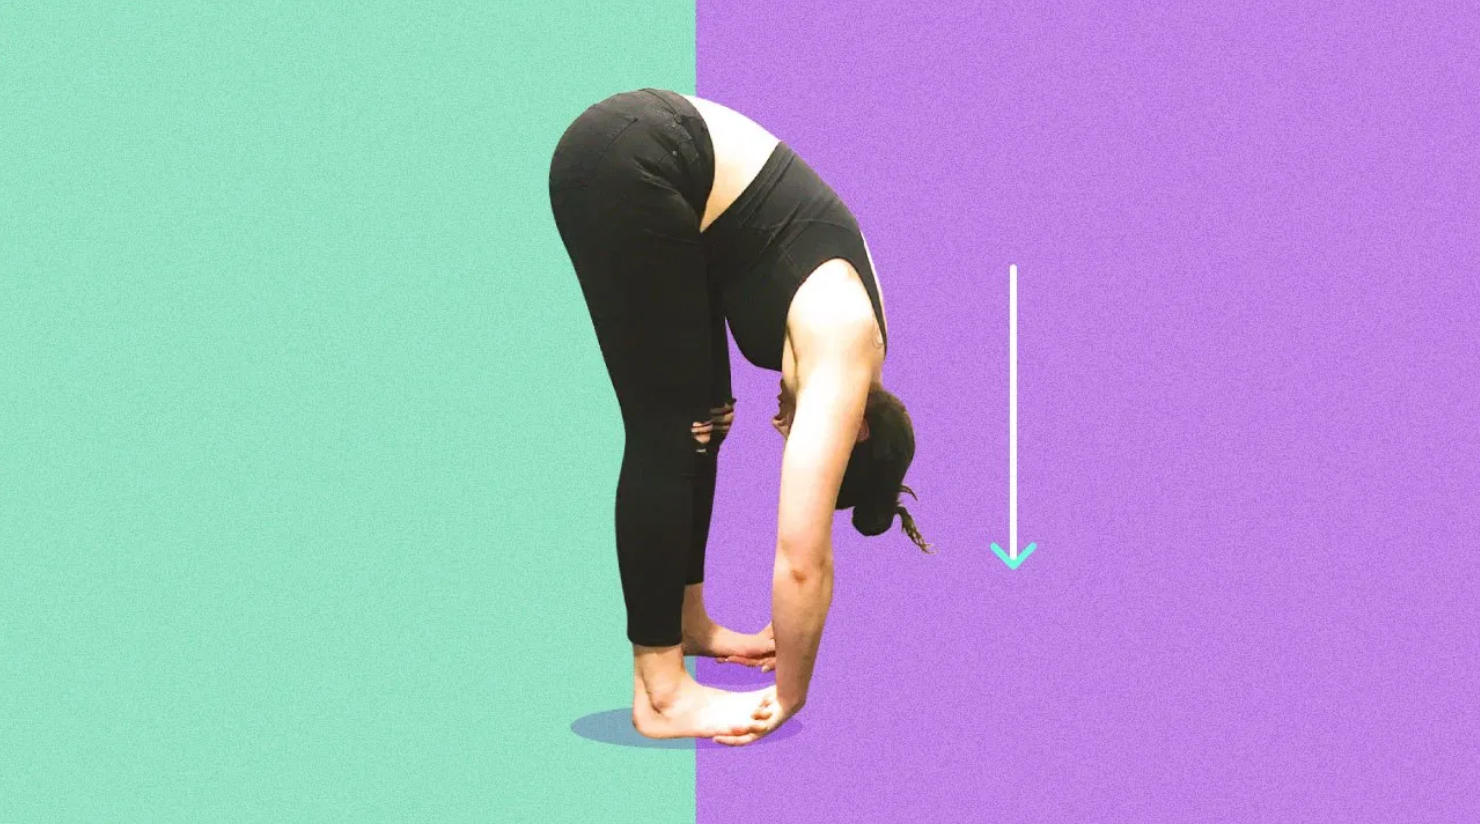
How to do it:
Take off your shoes and begin with your feet hip-distance apart. Then, bend forward, letting your arms touch the floor. If it’s difficult, take your arms only as far as it’s possible without straining.
Bend your knees and lift the balls of your feet off the ground to slip your hands, palms face-up, underneath your feet.
Allow your toes to come right into your wrist creases. Press into your palm with the balls of your feet and relax your head. Breathe here for at least three deep breaths.
5. Bow pose
Bow pose helps to counteract slouched shoulders by opening them from the front, and strengthening them from the back, explains Marina Mangano, DC, founder of Chiro Yoga Flow.
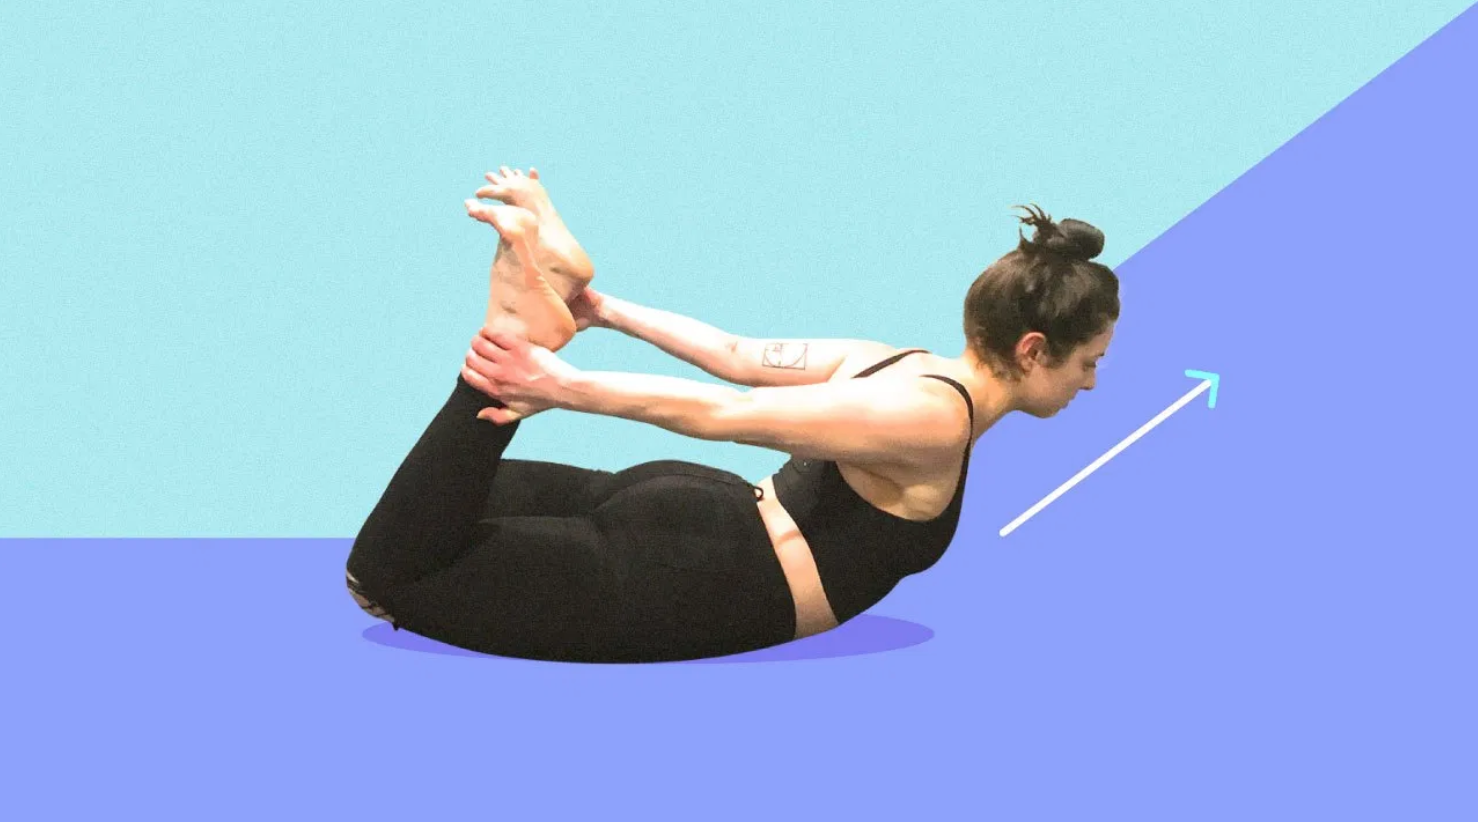
How to do it:
Lie flat on your stomach with your chin on the floor and your hands resting on either side of you.
Bend your knees and bring your heels as close to your buttocks as you can. Reach backwards with both hands and grab onto your outer ankles. As you inhale, lift your heels up toward the ceiling so that your chest, thighs, and upper torso lift up off the mat.
To intensify the stretch, try to lift your heels higher while keeping your tailbone pressed into the mat. Look forward and draw your shoulders away from your ears.
Hold this position for 10 breaths. Release on an exhale by slowly lowering your thighs, and then the rest of your body, to the ground.
6. Chin tuck
Chin tuck is a simple exercise you can do at your desk, at a stoplight, or even in a meeting at work. This simple stretch will help increase spinal awareness, while strengthening the neck muscles to help pull your head back into alignment, says Cappo.
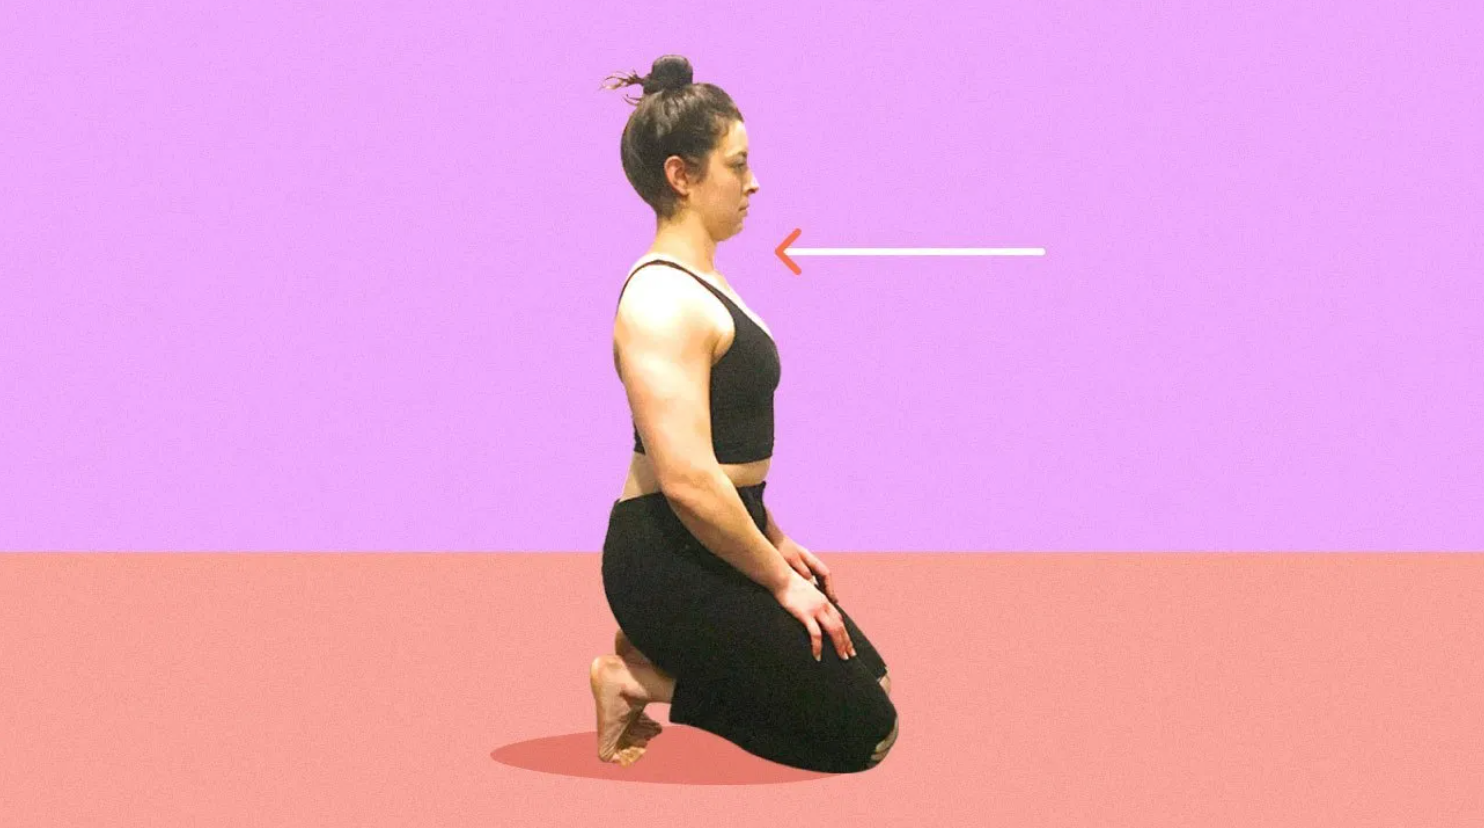
How to do it:
Sit up tall in a chair and keep your chin parallel to the floor. Without tilting your head in any direction, gently draw your head and chin back, like you’re making a double chin. Be careful not to jam your head back. You should feel a stretch along the back of the neck.
Now imagine there’s a string pulling your head upward like a puppet, and actively elongate your neck. Actively push the base of your skull away from the base of your neck. Keep your jaw relaxed and hold this position for 3 deep breaths.
Release your chin forward. Repeat.
How to prevent text neck from taking over
1. Change how you hold your phone
“Bring the screen to eye level so your head is not slouched forward or too high. Instead, keep a neutral spine so your ear is in line with your shoulders,” says Cappo. This will keep you from holding a forward-head posture for a prolonged period of time.
2. Take phone breaks
Frequent breaks from the screen can help, even if it’s just two to three minutes every hour. “Getting rid of the habit of looking down is my first suggestion to preventing and alleviating tech neck, but that’s highly unlikely for most people. So instead I recommend that people try to consciously take breaks from their phones,” says Goodrich. “Set reminders on your phone or computer, or use a sticky note. These small cues can make a huge difference.”
3. If you experience prolonged pain, see a pro
Seeing a physical therapist can not only help relieve your pain, but can help you get back on track with your good posture! Plus, it can prevent future pain, and teach your body how to strengthen your muscles correctly. To schedule a consult with a physical therapist, click here.
4. Do 10 minutes of yoga
The best way to treat and prevent neck and back pain is yoga, Goodrich says, because it helps improve movement patterns, increases body awareness, and incorporates breath work. Neck pain is caused by a muscular imbalance, such as tight rhomboids, but daily yoga sessions can help correct those differences. Doing the exercises mentioned above, or 10 minutes a day of yoga, can make a difference. To see what classes we’re offering, head to our fitness class page!